How to Apply Poly on Hardwood Floors for a Flawless Finish
Applying polyurethane to hardwood floors can seem like a big task, but it’s totally doable with the right steps. This guide will help you through every part of the process. From getting your floor ready to putting on the final coat, you’ll learn how to get a smooth and long-lasting finish. Whether you’re new to this or have done it before, these tips will help you get great results.
Key Takeaways
- Polyurethane gives hardwood floors a strong and lasting finish.
- Getting the floor ready by cleaning and sanding is very important.
- Using the right tools, like brushes or foam applicators, makes a big difference.
- Sanding between coats helps make the finish smooth and flawless.
- Regular upkeep keeps your polyurethane finish looking great.
Understanding Polyurethane for Hardwood Floors
Definition and Benefits of Polyurethane
Polyurethane, often referred to as poly, is a synthetic resin that forms a hard, durable coating on hardwood floors. It enhances the natural beauty of the wood while providing resistance to scratches, stains, and moisture. This makes it an ideal choice for high-traffic areas.
Types of Polyurethane Finishes
There are two main types of polyurethane finishes: oil-based and water-based. Oil-based polyurethane is known for its durability and rich finish, but it has a longer drying time and strong fumes. On the other hand, water-based polyurethane dries quickly, has less odor, and stays clear, making it a good choice for light-colored woods.
Choosing Between Oil-Based and Water-Based Polyurethane
When selecting polyurethane for your project, consider factors like drying time, odor, and the desired finish. Water-based floor finish is often preferred for its quick drying time and low odor, making it a popular choice for homes with children and pets. For a more durable and rich finish, oil-based polyurethane is a great option. Always ensure the product you choose is suitable for your specific type of wood and the conditions of your project.
Preparing Your Hardwood Floor for Polyurethane Application
Cleaning and Sanding the Surface
Before applying polyurethane, it's crucial to clean and sand the hardwood floor thoroughly. Start by removing all furniture and rugs from the room. Sweep or vacuum the floor to get rid of large debris. Use an oscillating floor sander or a drum floor sander to remove the existing finish if it's in poor condition. Avoid using steel wool, as it can cause rust under the finish. For engineered wood floors, be cautious as the top veneer is thin and may not withstand heavy sanding.
Dealing with Stains and Imperfections
Address any stains or imperfections before applying polyurethane. Use a HEPA-grade vacuum to remove all dust from sanding. Dampen a rag with mineral spirits to wipe down the floor, ensuring it's free of dust and debris. Apply painter's tape to walls and trim to protect them from the polyurethane. If there are any deep stains or imperfections, consider using a wood filler to even out the surface before proceeding with the finish.
Proper preparation is key to achieving a flawless polyurethane finish on your hardwood floors. Taking the time to clean, sand, and address imperfections will ensure a long-lasting and beautiful result.
Choosing the Right Sandpaper Grit
Selecting the right sandpaper grit is essential for a smooth finish. Floors in poor condition should be sanded with grit ranging from #100 to #150, gradually moving up to #220 grit. For floors in better condition, start with #120 grit and finish with #220 grit. This ensures the surface is smooth and ready for the polyurethane application.
Gathering Your Tools for the Job

To achieve a flawless polyurethane finish on your hardwood floors, having the right tools and materials is crucial. Below is a comprehensive list of what you'll need to get started.
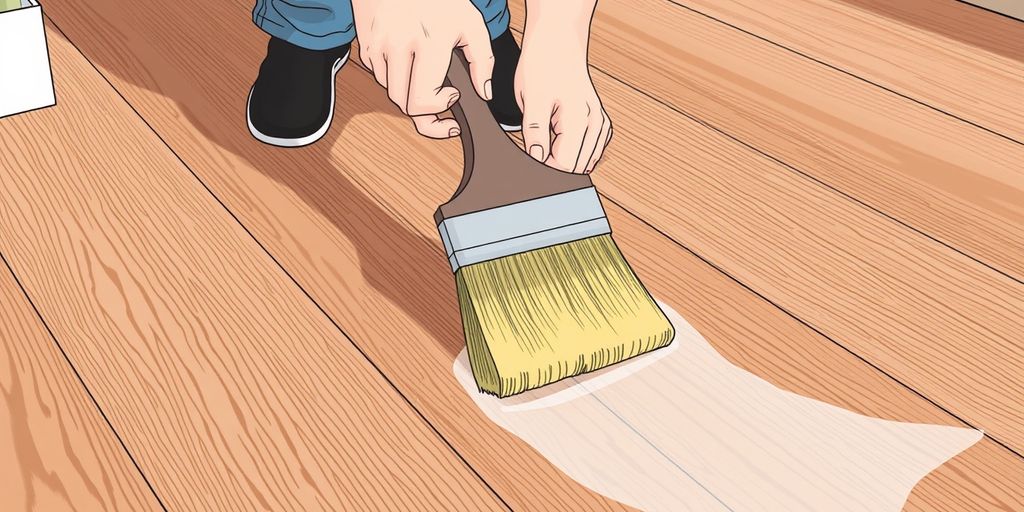
Applying the First Coat of Polyurethane
Applying the first coat of polyurethane is a crucial step in achieving a stunning finish on your hardwood floors. Follow these steps to ensure a smooth and durable application.
Intermediate Sanding Between Coats
Why Intermediate Sanding is Crucial
Intermediate sanding is a vital step in achieving a smooth and professional finish on your hardwood floors. This process ensures that each layer of polyurethane adheres properly, preventing issues like peeling or bubbling. Light sanding also helps to remove any imperfections or dust particles that may have settled on the surface.
Choosing the Right Sanding Pads
Selecting the appropriate sanding pads is essential for effective intermediate sanding. For most projects, a 220-grit sandpaper is recommended. This grit is fine enough to smooth the surface without causing damage. Avoid using steel wool, as it can leave behind particles that rust.
Cleaning Up After Sanding
After sanding, it's crucial to clean the floor thoroughly to remove all dust and debris. Use a vacuum or a tack cloth to ensure the surface is spotless before applying the next coat of polyurethane. This step is essential for achieving a flawless finish.
Applying Additional Coats of Polyurethane
Applying additional coats of polyurethane is crucial for achieving a durable and stunning finish on your hardwood floors. Here are some essential tips to ensure each coat is applied correctly and effectively.
Final Touches and Curing
Allowing Proper Curing Time
After applying the final coat of polyurethane, it's crucial to allow sufficient curing time. Rushing this step can compromise the finish. Typically, light foot traffic is permissible after 24 hours, but full curing can take up to 7 days. During this period, avoid placing heavy furniture or rugs on the floor.
Special Considerations for High-Traffic Areas
High-traffic areas require extra attention. Consider using a more durable polyurethane or adding an extra coat for added protection. This ensures the floor withstands daily wear and tear without losing its luster.
Maintaining the Finished Floor
Once the polyurethane has fully cured, maintaining the floor is essential for longevity. Regular cleaning with a damp mop and avoiding harsh chemicals will keep the finish looking new. For added protection, consider using area rugs in high-traffic zones.
Using Polyurethane on Different Wood Types
Application on Light vs. Dark Woods
When applying polyurethane on light woods like maple or birch, water-based polyurethane is often preferred. This is because it maintains the wood's natural color without adding an amber tint. On the other hand, oil-based polyurethane can add a warm, amber glow that enhances the richness of dark woods like walnut or mahogany.
Special Techniques for Exotic Hardwoods
Exotic hardwoods, such as Brazilian cherry or teak, often have natural oils that can interfere with the adhesion of polyurethane. To ensure a durable finish, it's crucial to clean the surface thoroughly and consider using a de-waxed shellac as a sealer before applying polyurethane.
Dealing with Tannin Reactions
For a Low-VOC wood finish, water-based polyurethane is an excellent choice, especially for indoor applications where air quality is a concern. This type of finish helps to prevent tannin reactions and color changes in the wood, ensuring a consistent and beautiful appearance.
Troubleshooting Common Issues
Avoiding Bubbles and Streaks
Bubbles and streaks can ruin the look of your hardwood floor. To avoid these, make sure to stir the polyurethane gently instead of shaking it. Shaking introduces air bubbles that can get trapped in the finish. Also, apply thin, even coats and use a high-quality brush or roller.
Fixing Lap Marks and Uneven Coats
Lap marks and uneven coats are common problems when applying polyurethane. To fix these, work in small sections and maintain a wet edge. This means you should overlap each stroke slightly with the previous one while the finish is still wet. If you notice lap marks after the finish has dried, lightly sand the area and reapply a thin coat.
Addressing Adhesion Problems
Adhesion problems can occur if the surface is not properly prepared. Ensure the floor is clean, dry, and free of any wax, oil, or dust. Sanding the floor correctly is crucial for good adhesion. If you still face issues, consider using a bonding agent or primer designed for hardwood floors.
Maintaining Your Polyurethane Finish
Regular Cleaning and Care
Keeping your polyurethane-coated hardwood floors clean is essential for their longevity. Sweep or vacuum daily to remove dust and debris. Use a damp mop with a mild cleaner specifically designed for polyurethane floors. Avoid excessive water and harsh chemicals, as they can damage the finish.
- Daily Cleaning: Sweep or vacuum to remove dust and debris.
- Weekly Cleaning: Use a damp mop with a mild cleaner.
- Avoid: Excessive water and harsh chemicals.
Tip: Consider professional cleaning once or twice a year. Experts have specialized tools and products to deep clean and restore your floor’s shine.
Periodic Reapplication
Over time, high-traffic areas may show signs of wear and require reapplication of polyurethane. Lightly sand the worn areas with fine-grit sandpaper to create a smooth surface for the new coat to adhere to. Clean the area thoroughly and apply a thin coat of polyurethane, following the same application techniques as initially used.
- Inspect: Regularly check for signs of wear.
- Sand: Lightly sand worn areas with fine-grit sandpaper.
- Clean: Ensure the area is dust-free before application.
- Reapply: Apply a thin coat of polyurethane.
Dealing with Wear and Tear
For minor scratches and scuffs, use a polyurethane-compatible touch-up kit. These kits can help you address blemishes promptly, maintaining the floor’s appearance and protection. For larger areas, consider reapplying a thin coat of polyurethane.
- Immediate Action: Address scratches and scuffs as soon as they appear.
- Tools: Use a rubber eraser or specific cleaning product for minor scratches.
By following these best practices, you can ensure your polyurethane floors remain durable, safe, and visually appealing.
Conclusion
Achieving a flawless finish on your hardwood floors with polyurethane is a task that requires patience, attention to detail, and the right tools. By following the steps outlined in this guide, from thorough preparation to careful application and proper drying times, you can ensure a professional-quality result. Remember, the key to a stunning finish lies in the details: proper sanding, clean surfaces, and thin, even coats of polyurethane. With these tips, your hardwood floors will not only look beautiful but also stand the test of time. Happy refinishing!
Frequently Asked Questions
What is polyurethane and why is it used on hardwood floors?
Polyurethane is a type of synthetic resin that creates a hard, durable coating on hardwood floors. It's used to protect the wood from scratches, stains, and moisture, while also enhancing its natural beauty.
What are the differences between oil-based and water-based polyurethane?
Oil-based polyurethane gives a warm, amber tint and is very durable, but it takes longer to dry and has a stronger odor. Water-based polyurethane dries faster, has a milder odor, and keeps the wood's natural color, but it may not be as durable as oil-based options.
How should I prepare my hardwood floor before applying polyurethane?
First, clean the floor thoroughly by sweeping or vacuuming. Then, sand the floor to remove the old finish and smooth out any imperfections. Finally, clean up all the dust using a vacuum and a tack cloth.
How many coats of polyurethane should I apply?
It's generally recommended to apply at least three coats of polyurethane. The first coat seals the wood, and the subsequent coats build up the protective layer.
Why is it important to sand between coats of polyurethane?
Sanding between coats helps to remove any imperfections and ensures that each new coat adheres properly to the previous one. This results in a smoother and more durable finish.
How long does it take for polyurethane to dry and cure?
Polyurethane can be walked on carefully after about 4 hours, but it takes 24 hours for light use. Full curing can take up to 5 days, during which the floor should be used minimally to allow the finish to harden completely.
Can I apply polyurethane on engineered wood floors?
Yes, you can apply polyurethane on engineered wood floors, but be cautious when sanding as the top veneer layer is thin and can be easily damaged.
How do I maintain a polyurethane finish on my hardwood floor?
To maintain a polyurethane finish, regularly clean the floor with a soft broom or vacuum. Avoid using harsh chemicals or abrasive cleaners. For high-traffic areas, consider reapplying a coat of polyurethane every few years to keep the finish looking fresh.