Expert Tips for Applying Poly on Hardwood Floors for a Flawless Finish
Applying polyurethane to hardwood floors can seem like a big task, but with the right tips and techniques, you can achieve a professional-looking finish. This guide will walk you through everything you need to know—from understanding what polyurethane is to preparing your floor and finally applying the finish. Whether you're a DIY enthusiast or just looking to refresh your home, these expert tips will help you achieve a flawless result.
Key Takeaways
- Polyurethane is a protective finish that enhances the look and durability of hardwood floors.
- Proper preparation, including cleaning and sanding, is crucial for a smooth application.
- Choosing between oil-based and water-based polyurethane depends on your specific needs.
- Using the right tools and safety gear ensures a professional finish.
- Regular maintenance and reapplication keep your floors looking great for years.
Understanding Polyurethane for Hardwood Floors
Definition and Benefits of Polyurethane
Polyurethane, often called poly, is a synthetic resin that forms a hard, durable coating on hardwood floors. It enhances the natural beauty of the wood while providing resistance to scratches, stains, and moisture. This makes it an ideal choice for high-traffic areas. Polyurethane is a protective finish that enhances the look and durability of hardwood floors. The benefits of using polyurethane include:
- Enhanced durability and protection
- Improved aesthetic appeal
- Resistance to wear and tear
Types of Polyurethane Finishes
There are two primary types of polyurethane finishes: oil-based and water-based. Oil-based polyurethane is known for its durability and rich finish, while water-based polyurethane dries quickly and has less odor. Both types offer excellent protection, but the choice depends on your specific needs and preferences.
Choosing Between Oil-Based and Water-Based Polyurethane
When deciding between oil-based and water-based polyurethane, consider the following factors:
- Drying Time: Water-based polyurethane dries faster, allowing for quicker project completion.
- Odor: Oil-based polyurethane has a stronger odor, requiring better ventilation during application.
- Color: Oil-based polyurethane tends to amber over time, adding a warm tone to the wood, while water-based polyurethane remains clear, preserving the wood's natural color.
- Durability: Both types are durable, but oil-based polyurethane is often considered more robust for high-traffic areas.
By understanding the differences between oil-based and water-based polyurethane, you can choose the best option for your specific project needs.
Initial Preparation Steps
Choosing Your Applicator
Selecting the right applicator is essential for a smooth finish. Lambswool applicators are highly recommended for their ability to provide a flawless coat. Synthetic lambswool is suitable for water-based polyurethane but not for oil-based types. Always refer to the manufacturer's instructions for the best applicator options.
Cleaning the Floor
Start by sweeping away large debris with a broom. Then, use a HEPA-grade vacuum to remove fine dust particles. This step is crucial to ensure a clean surface for the polyurethane to adhere to.
Patching and Sanding
Inspect the floor for any cracks or dings. Use a pre-mixed liquid concrete patch for deep cracks, and pack them with foam filler cord if necessary. Allow the patches to cure for at least 24 hours before proceeding. Sanding is vital for removing the old finish and creating a rough surface for the new coating to adhere to. Use an oscillating floor sander or a drum floor sander for this task. Start with #100 to #150 grit sandpaper for floors in poor condition and work up to #220 grit.
Taping Off Areas
Apply painter’s tape to walls, trim, and any other large items that cannot be removed. This prevents the polyurethane from seeping under the tape and creating a mess.
Proper preparation is the key to achieving a professional finish on your hardwood floors. Taking the time to do these steps thoroughly will ensure the best results.
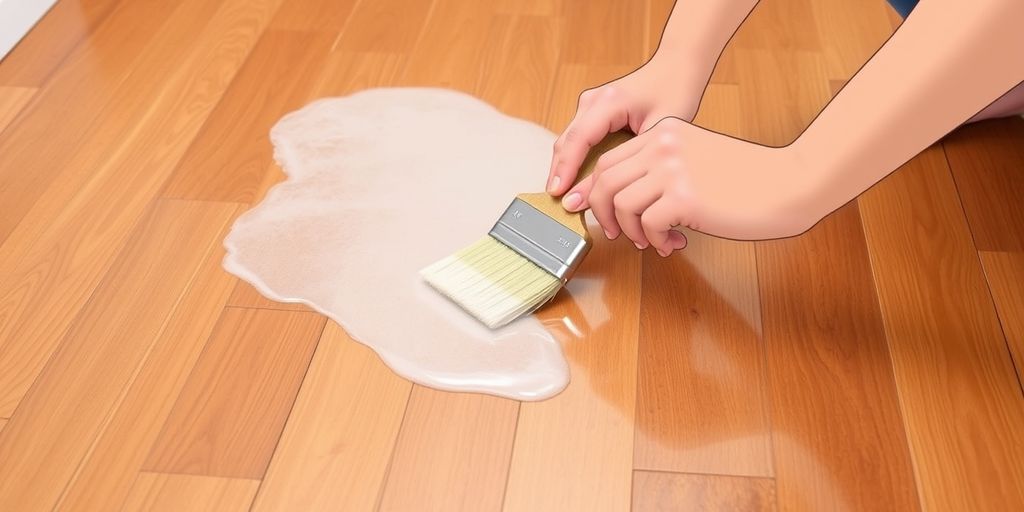
Applying the First Coat
Mixing the Polyurethane
Before you start, ensure the polyurethane is well-mixed. Stir gently to avoid creating bubbles, which can ruin the finish. Pour a small amount into a separate container to prevent contamination of the main can.
Using a Roller for Large Areas
For large, flat surfaces, a roller is your best friend. A 6-inch microfiber roller works well. Dampen it with mineral spirits before use to minimize lint. Apply the polyurethane in long, even strokes, following the wood grain. Overlap each stroke slightly to ensure even coverage. Keep a wet edge to avoid lap marks.
Wipe-On Polyurethane for Tight Spaces
For small or intricate areas, wipe-on polyurethane is ideal. Soak a clean cloth in the polyurethane and wring out the excess. Wipe it onto the wood surface with long, even strokes, following the grain. This method is great for avoiding drips and sags in tight spaces.
Remember, the key to a flawless finish is patience and attention to detail. Take your time with each step to ensure the best results.
Drying and Curing Times for Polyurethane
Understanding the drying and curing times for polyurethane is crucial for achieving a durable and flawless finish on your hardwood floors. Proper timing ensures that the finish sets correctly and provides long-lasting protection.
Initial Drying Phase
After applying the first coat of polyurethane, it typically takes about 4 hours for the surface to be dry to the touch. During this period, avoid walking on the floor to prevent any marks or damage. Fast-drying floor varnish like ProCoat Paragon can speed up this process, allowing for quicker project completion.
Intermediate Sanding
Once the initial coat is dry, it's essential to perform intermediate sanding. This step helps to smooth out any imperfections and prepares the surface for additional coats. Use fine-grit sandpaper and gently sand the floor, then clean up any dust and debris before applying the next coat.
Final Curing Period
The final curing period is the most critical phase. While the floor may be ready for light use after 24 hours, full curing can take up to 5 days. During this time, avoid placing heavy furniture or rugs on the floor. For high-traffic areas, consider extending the curing time to ensure maximum durability.
Proper curing is essential for a durable finish. Allow the final coat of polyurethane to cure for at least 24 hours before handling. For floors or surfaces that will experience heavy traffic, curing time might extend to several days or more.
Special Considerations for Different Wood Types
Applying Poly on Dark Woods
When working with dark woods like walnut or mahogany, it's crucial to select a finish that enhances the wood's natural richness. Oil-based polyurethane is often the go-to choice for these woods as it deepens the color and adds a warm, amber hue. Apply thin coats to avoid a blotchy appearance.
Techniques for Light-Colored Woods
For light-colored woods such as maple or birch, a water-based polyurethane is ideal. This type of finish maintains the wood's natural color without yellowing over time. Apply multiple thin coats and sand lightly between each to achieve a smooth, clear finish.
Polyurethane on Exotic Hardwood Species
Exotic hardwoods like teak or Brazilian cherry require special attention due to their dense and oily nature. Use a Low-VOC wood finish to prevent any adverse reactions. It's crucial to clean the surface thoroughly and consider using a sealer before applying the polyurethane to ensure proper adhesion.
Remember, the key to a flawless finish is understanding the unique properties of each wood type and selecting the appropriate polyurethane product accordingly.
Periodic Maintenance and Reapplication of Polyurethane
Maintaining your hardwood floors with polyurethane is essential for keeping them looking their best. Regular upkeep can extend the life of the finish and ensure your floors remain beautiful and protected for years to come.
Troubleshooting Common Issues
Dealing with Bubbles and Streaks
Bubbles in polyurethane can be caused by moisture or air trapped under the finish. To avoid this, ensure the wood surface is completely clean and dry before applying the polyurethane. Apply thin coats and brush out any bubbles as you go. Allow proper drying time between coats to prevent streaks and bubbles.
Fixing Uneven Coats
Uneven coats can result from improper application techniques or inconsistent drying conditions. To fix this, sand the uneven areas lightly with fine-grit sandpaper and reapply a thin coat of polyurethane. Make sure to use a high-quality applicator like a 9-inch microfiber roller for a smooth finish.
Addressing Dust and Debris
Dust and debris can settle on the wet polyurethane, causing imperfections. To minimize this, work in a clean, dust-free environment. Use a tack cloth to wipe the surface before each coat. If dust does get into the finish, lightly sand the affected area and reapply a thin coat of polyurethane.
Troubleshooting common issues with polyurethane application can save you time and effort in the long run. With careful preparation and attention to detail, you can achieve a flawless finish on your hardwood floors.
Professional Tips for Optimal Results
Maintaining a Wet Edge
To achieve a smooth and even finish, it's crucial to maintain a wet edge while applying polyurethane. This technique helps prevent lap marks and streaks. Work in small sections and blend each new stroke into the previous one before it dries. This ensures a seamless appearance across the entire floor.
Proper Ventilation During Application
Proper ventilation is essential when applying polyurethane. Open windows and use fans to circulate air, which helps the finish dry evenly and reduces the buildup of fumes. Good airflow also minimizes the risk of dust settling on the wet surface, ensuring a cleaner finish.
Final Inspection and Touch-Ups
After the polyurethane has dried, conduct a thorough inspection of the floor. Look for any missed spots, bubbles, or imperfections. Use fine-grit sandpaper to smooth out any rough areas and apply touch-up coats as needed. This final step ensures a flawless and professional-looking finish.
Remember, patience and attention to detail are key to achieving the best results when applying polyurethane to hardwood floors.
Environmental and Safety Considerations
When applying polyurethane to hardwood floors, it's crucial to consider both environmental and safety factors. This ensures not only a beautiful finish but also a safe and eco-friendly process.
Advanced Techniques for a Flawless Finish

Using a Roller for Large Areas
For expansive, flat surfaces, employing a roller can save time and ensure an even application. A clean work area is essential. The less dust in the project area, the more flawless your finish will be. Spread out 6-mil poly under the piece to protect the floor from drips and spills, making cleanup easier. Avoid finishing on the same day you sand, as dust can linger in the air for hours. Start with clean clothes and hair to minimize contamination.
Wipe-On Polyurethane for Tight Spaces
Wipe-on polyurethane is perfect for tight spaces and intricate details. It allows for more control and reduces the risk of drips and runs. Use a clean, lint-free cloth to apply the polyurethane in thin, even coats. This method is especially useful for areas where a roller or brush might be too cumbersome.
Handling Minor Repairs
Before applying polyurethane, inspect the floor for any minor repairs that need to be addressed. Fill any small gaps or cracks with a wood filler that matches the floor color. Sand the filled areas smooth before applying the polyurethane. This ensures a seamless and professional finish.
Remember, the key to a flawless finish is understanding the unique properties of each wood type and selecting the appropriate polyurethane product accordingly.
Conclusion
Applying polyurethane to hardwood floors is a task that requires patience and attention to detail, but the results are well worth the effort. By following the expert tips and techniques outlined in this guide, you can achieve a flawless, professional-grade finish that enhances the beauty and durability of your floors. Remember to take your time with each step, from preparation to final application, and don't rush the drying process. With careful planning and execution, your hardwood floors will not only look stunning but also stand up to daily wear and tear for years to come. Happy finishing!
Frequently Asked Questions
What is polyurethane and why is it used on hardwood floors?
Polyurethane is a synthetic resin that creates a hard, protective layer on wood surfaces. It's used on hardwood floors to enhance their natural beauty and to protect against scratches, stains, and moisture.
What are the main types of polyurethane finishes?
There are two main types of polyurethane finishes: oil-based and water-based. Oil-based polyurethane is durable and gives a rich finish, while water-based polyurethane dries quickly and has less odor.
How do I choose between oil-based and water-based polyurethane?
Choosing between oil-based and water-based polyurethane depends on your needs. Oil-based polyurethane is more durable and gives a warm, amber hue. Water-based polyurethane dries faster and has less odor, making it ideal for indoor use.
What tools do I need to apply polyurethane on hardwood floors?
To apply polyurethane, you'll need a lambswool applicator or a high-quality brush for larger areas, and a lint-free cloth for tight spaces. Make sure to have sandpaper, a vacuum, and painter's tape for preparation.
How long does it take for polyurethane to dry?
The drying time for polyurethane varies. It can be walked on carefully after about 4 hours, light use is okay after 24 hours, and full use is possible after 5 days. These times can change based on temperature and humidity.
How do I prepare my hardwood floor before applying polyurethane?
First, clean the floor thoroughly to remove dust and debris. Sand the floor to remove old finishes and create a rough surface for the new coating. Patch any cracks or dings, and tape off areas you don't want to coat.
What should I do if I notice bubbles or streaks in the polyurethane finish?
Bubbles or streaks can be caused by trapped air or moisture. Make sure the surface is clean and dry before applying. Apply thin coats and brush out any bubbles as you go. If you see bubbles, sand the area lightly and reapply a thin coat.
How often should I reapply polyurethane to maintain my hardwood floors?
Inspect your floors regularly for signs of wear, like dull spots or scratches. Lightly sand and clean the worn areas, then apply a thin coat of polyurethane. Reapplying every few years helps keep your floors looking great.